If your heart is in the world of motors and you enjoy building your own model cars, scale modeling is a fun way to pass the time and express yourself. It is also an amazing opportunity to make many interesting friends around the world.
If you are interested in this hobby but don't know where to start, we can help you. We'll show you how to build your first scale model from start to finish.
How to choose a car model kit to build at home?
When choosing your first model kit, consider factors such as your interests, experience, and the size or scale of the model you want to build. Here are a few points to pay attention to:
Choose the level of difficulty that suits you.
Building a model kit should be fun, so choose the model kits that suit your skill level. You can find this information on the website of the model manufacturer or seller. So, for example, such a well-known manufacturer as Revell presents a "Skill Level" that ranges from 1 to 5. Level 1 model kits are the easiest to build.
The difficulty level determines how many elements and parts the car model set will have.
When putting together your first kit, keep in mind that it doesn't need to be perfected. You can even not paint it at all, the most important thing at this stage is to focus on the skill of connecting parts of a model. It is important that the parts fit together and all the gaps between them are filled. This will build your confidence and motivation, which is essential in order to continue and develop your hobby. Rome was not built immediately, so please be patient.
Choose the car model that you really like.
Whether it's a model f1 car kit or an SUV or classic Volkswagen Beetle or VW T1 Samba Bus Flower Power, you should choose a model that really interests and motivates you. It takes several days to create a single model, I often make models for a whole month, so it is very important to choose a favourite model or a model that you would like to know more about
Study your model
After choosing the perfect model kit, study your model. View photos of the real model to see all the details, see how the motor is built, get ideas for painting and decorating. I advise you to visit the forums where experienced modelers publish tips and are happy to share their experience and help a beginner in the build process.
Choose the optimal scale.
Popular model kit scales include 1:8, 1:12, 1:16, 1:20, 1:24, 1:32, 1:48, and 1:72. The smaller the second number, the larger the model and, accordingly, closer in size to the real thing.
Modellers with more experience tend to choose small scale models because they contain more small parts and take longer to assemble. But there are also complex large-scale models for experienced modellers. Always read the technical abstract carefully. If you wish to accept the call, please follow the instructions carefully. The most optimal scale for beginners, in my opinion, are 1:24 and 1:20 scale kits.
What supplies do you need for car scale modelling?
One car model kit is not enough to build a car at home. You should not start assembling a model if you do not have the necessary tools for the job. You don't need to buy all tools right from the start, but having the basic materials to assemble your car model will make your job easier and more enjoyable.
Model car kit
The most obvious item you need to buy is the plastic model car kit. These Model kits include all the parts needed to build a model, usually attached to a frame called a sprue. If you want to use the piece attached to the sprue, you just have to cut it off. I draw your attention to the fact that there are car model sets made of resin. But they are not suitable for entry level.
There are model kits that feature all sorts of subjects, including people, animals, decals. Some kits include paints and brushes. Our store has a wide range of kits for beginner fashion designers. I am sure that you will not have any problems with the choice. Here are some of the more popular patterns for beginners:
ITALERI RANGE ROVER Classic 50th Anniversary
ITALERI FIAT Abarth 695SS - Assetto Corsa 4705
REVELL VW Beetle Limousine 1968
Hasegawa LANCIA Stratos HF "1977 Safari Rally"
Glue
You must first learn how to choose the right glue for your project.
The best option is Liquid cement, it is suitable for many applications. In our store we have Tamiya Cement w/Brush 20ml. This glue is designed for modelers who are starting in the hobby. It allows to stick the plastic of your models with comfort since its formulation is a little viscous and allows to control very well the amount of glue that is used every time. It also includes a small brush to facilitate the application.
There are also several other options, each suitable for certain types of models.
Cyanoacrylate (CA): Commonly referred to as super glue, cyanoacrylate or CA is extremely popular in the model making world. It is used when bonding metal parts or metal and plastic components. The important thing to remember here is that it sets very quickly, so you have to be careful when aligning the parts. It also shouldn't come into contact with the skin, as it also glues your fingers together quickly and easily.
In our store there is a special unique glue of this type – Colle 21, it works only if there is a constant pressure between the parts to be glued for 10/15 seconds. Without pressure, Colle 21 does not work and does not respond. This important feature allows Colle21 superglue not to dry out on the surface without deliberate intervention by the modeler. The line Colle21 also includes an accompanying glue enhancer and glue remover. Thanks to the precision needle included with the bottle, Colle21 (cyanoacrylate glue) is easy to use and is applied precisely without wasting even a drop. Colle21 (cyanoacrylate glue) can be used in DIY, modeling, repair and nail reconstruction.
Polyvinyl Acetate (PVA): Polyvinyl acetate, also called PVA, is a fairly popular adhesive. It is commonly used for landscaping or building dioramas. Its fixation is not very strong, like transparent adhesives. It is easy to use. If you make a mistake, you can quickly delete it.
Epoxy adhesive: It consists of two components: glue and hardener. Mix equal amounts from both tubes; after the mixture is prepared and applied, the adhesive begins to work in five to ten minutes. Another 24 hours are required for complete drying and hardening. This adhesive is difficult to apply in small quantities. In the plus, its high durability and the ability to work with it for a long time. It is suitable for firmly fixing on structural elements.
White glue (PVA):It is a non-toxic glue especially useful for jobs that do not require considerable resistance, for attaching equipment to the wagon or arranging luggage and flags. Dried it becomes transparent and shrinks. A big advantage is its ability to rebuild itself when wet when it is still fresh.
Many models are sold already painted. But as a rule, this is a simple base color. Some of modeling kits include paints and brushes. If you want to make your own color modification, you will need several different types of brushes, from thin to soft wide brushes.
Tweezers are a very important tool for positioning small parts. Many types of tweezers are available, including flat or pointed ends, lockable or spring loaded. I advise to have a collection of different types.
As I stated above, some of kits already include paints. But some of them. However, I advise you to buy professional paints separately. Modellers usually use one of two types of paint for model kits:
Acrylic Based Paint: This is the most common paint for model kits. Acrylic based paints give excellent results.
Solvent based enamels: specially designed for airbrush use only. They are already pre-diluted, so no additional diluent is required.
Tape is required to mark paint areas or panel lines, hold loose parts together, and hold glued components together. Here are some of the types of tapes: masking and transparent.
Сutting mat
The cutting mat will protect your surfaces from marks and damage caused by sharp cutting tools that are used in modeling. There are self-healing mats - they are made from fibers of a material that allow sharp edges to slide between them.
Perhaps the most important modeling tool is a knife or cutter. A hobby knife is necessary for marking the lines of panels, applying filler, as well as for cutting decals, removing parts from sprues. It will come in handy in any other situation where you need to cut out details from a model or scrape something. I advise you to make sure that the knife is sharp, and also have a few extra new blades in stock.
There are all sizes and shapes and they can be found in art and hobby stores. I advise using the ones with interchangeable blades that need to be broken in order to always find the best length. It is important to choose an item that provides a secure grip and a good hold on the blade to prevent it from moving at the point of greatest effort.
Take a look at these knife models in our shop.
In hardware stores you can find needle file sets of different sections. I have special sets and individual products, which include different base sections: square, rectangular, round and triangular, and also have different types of notches to achieve different depths of removal when filing. They quickly remove excess plastic and can be easily cleaned with a wire brush.
Pliers and cutters
Pliers are also very handy for removing excess sprue from plastic parts. Their cut is clean and they are used to remove small residues around plastic parts.
This tool is very useful and not necessarily expensive. Manicure and beauty equipment for our wives can be an inexhaustible source for us modelers. With the help of nail scissors, you can process small details, remove some parts attached.
An essential ingredient in model making is sandpaper. All abrasive papers quickly remove excesses from the material to be cleaned. The emery type is moistened with water to make the surface less rough.
I use also Smoothing files. Colle 21 has created a line of files, which are ideal to prepare a good bonding with the Colle21 cyanoacrylate glue.
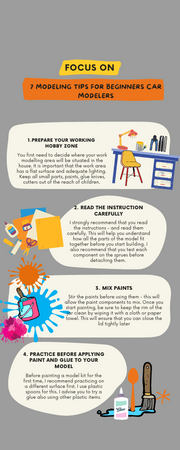
7 MODELING TIPS FOR BEGINNERS CAR MODELERS
So, you have found the perfect model kit and purchased all the necessary tools. Before you get started, read these static scale modeling tips to make building your first model as fun and enjoyable as possible.
- Prepare your working hobby zone
You first need to decide where your work modelling area will be situated in the house. It is important that the work area has a flat surface and adequate lighting. In addition, paints and glues can have unpleasant odors. Paints and glues are also toxic. Pay attention to this and exclude pets from the zone. Keep it out of the reach of children. You will need a movable retractable table lamp that will allow you to light up when you want to focus on the small details.
Keep all small parts, paints, glue knives, cutters out of the reach of children. Most likely, if there are children in the house, you will need high shelves or a lockable cabinet.
Regardless of the size of your model, you will be dealing with a lot of tiny details that you cannot afford to lose. For this purpose, I recommend purchasing a resealable plastic bag or a clean, empty container for storing small parts.
- Read the instruction carefully
I strongly recommend that you read the instructions - and read them carefully. This will help you understand how all the parts of the model fit together before you start building. I also recommend that you test each component on the sprues before detaching them. For example, some parts sometimes look very similar to each other, or there may be several identical parts. For this reason, it is important to compare the details with the illustrations in the instructions.
Carefully follow the step-by-step instructions and take your time and do not get ahead of yourself. Otherwise, you run the risk of finding that some parts do not fit.
- Mix paints
Stir the paints before using them - this will allow the paint components to mix. Once you start painting, be sure to keep the rim of the jar clean by wiping it with a cloth or paper towel. This will ensure that you can close the lid tightly later.
- Practice before applying paint and glue to your model.
Before painting a model kit for the first time, I recommend practicing on a different surface first. I use plastic spoons for this. I advise you to try a glue also using other plastic items.
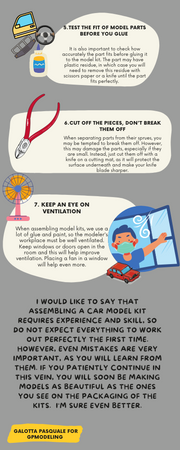
- Test the fit of model parts before you glue
It is also important to check how accurately the part fits before gluing it to the model kit. The part may have plastic residue, in which case you will need to remove this residue with scissors paper or a knife until the part fits perfectly.
- Cut off the pieces, don't break them off.
When separating parts from their sprues, you may be tempted to break them off. However, this may damage the parts, especially if they are small. Instead, just cut them off with a knife on a cutting mat, as it will protect the surface underneath and make your knife blade sharper.
- Keep an eye on ventilation
When assembling model kits, we use a lot of glue and paint, so the modeler's workplace must be well ventilated. Keep windows or doors open in the room and this will help improve ventilation. Placing a fan in a window will help even more.
Finally, I would like to say that assembling a car model requires experience and skill, so do not expect everything to work out perfectly the first time. However, even mistakes are very important, as you will


